
How to Break In a New Women’s Cowboy Hat
You’ve finally done it. You found the one. It’s sitting in its box or on your bed, looking absolutely perfect. Maybe it’s a sleek black felt Stetson that makes you feel like you could run a ranch, or a high-end palm leaf straw that’s ready for a summer festival. You put it on, look in the mirror, and feel invincible.
Then, about 45 minutes later, reality hits.
It starts as a dull pressure on your forehead. Then, it turns into a throbbing squeeze at your temples. You take the hat off, and there it is: the dreaded “red line of doom” across your forehead.
If you are reading this, you are probably holding a beautiful, expensive hat in your hands, wondering if you bought the wrong size or if you just have a weirdly shaped head.
Don’t panic. And please, do not return it just yet.
Breaking in a cowboy hat is a rite of passage. It is the difference between a costume piece and a part of your soul. A real western hat isn’t supposed to fit perfectly the second you buy it—it’s supposed to learn your head.
This guide is for the women who want to wear their hats all day without popping ibuprofen. We’re going to cover everything from steam hacking to the “long oval” curse, and how to mold that stiff felt into a second skin.
The “Why” Behind the Ouch: Understanding Your Hat
To fix the pain, you have to understand what you are fighting against.
If you bought a high-quality hat (think beaver felt, buffalo wool, or high-grade straw), you are dealing with materials designed to be durable. They are stiffened with shellac or other stiffening agents to hold their shape against wind, rain, and hard use.
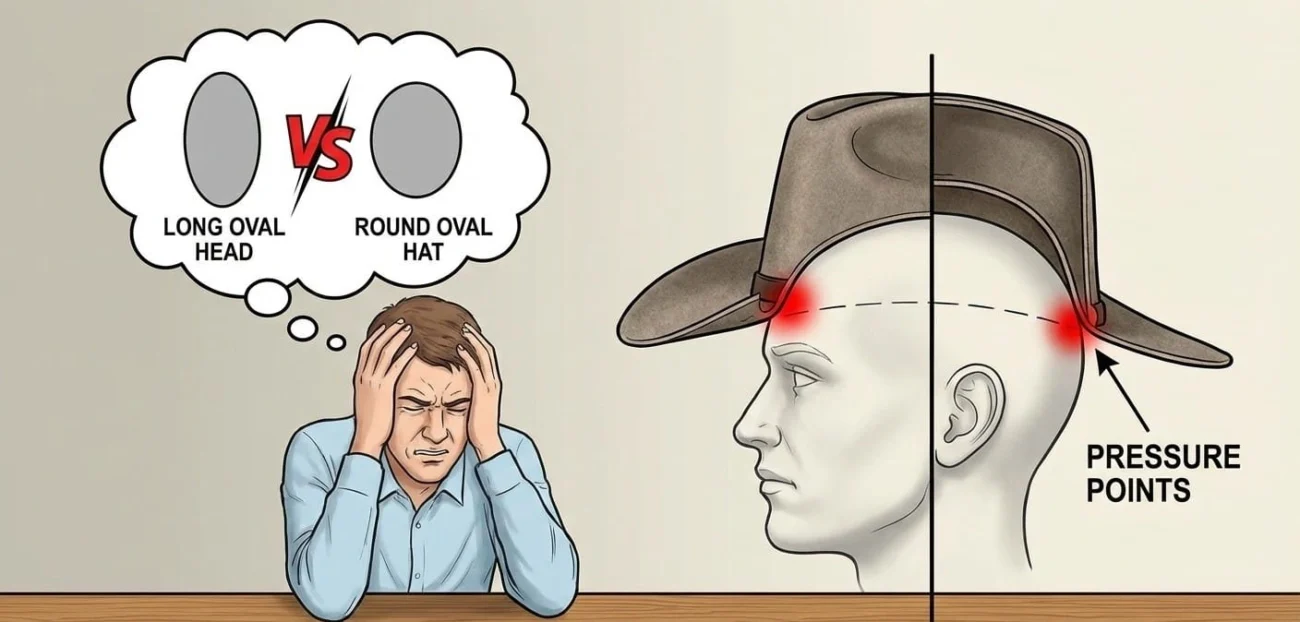
When a hat comes out of the factory, it is perfectly round or a standard “regular oval.” Here is the problem: Your head is likely not a perfect geometric oval.
Human heads have lumps, bumps, and varying widths. Most women actually have what hatters call a “Long Oval” head shape—meaning your head is longer from front-to-back than it is side-to-side. But most off-the-rack hats are “Round Ovals.”
When you put a Round Oval hat on a Long Oval head, the hat presses hard against your forehead and the back of your skull, while leaving gaps on the sides above your ears. That pressure points on the forehead is what causes the infamous “hat headache.”
The goal of breaking it in is simply redistributing that pressure so the hat hugs you, rather than squeezes you.
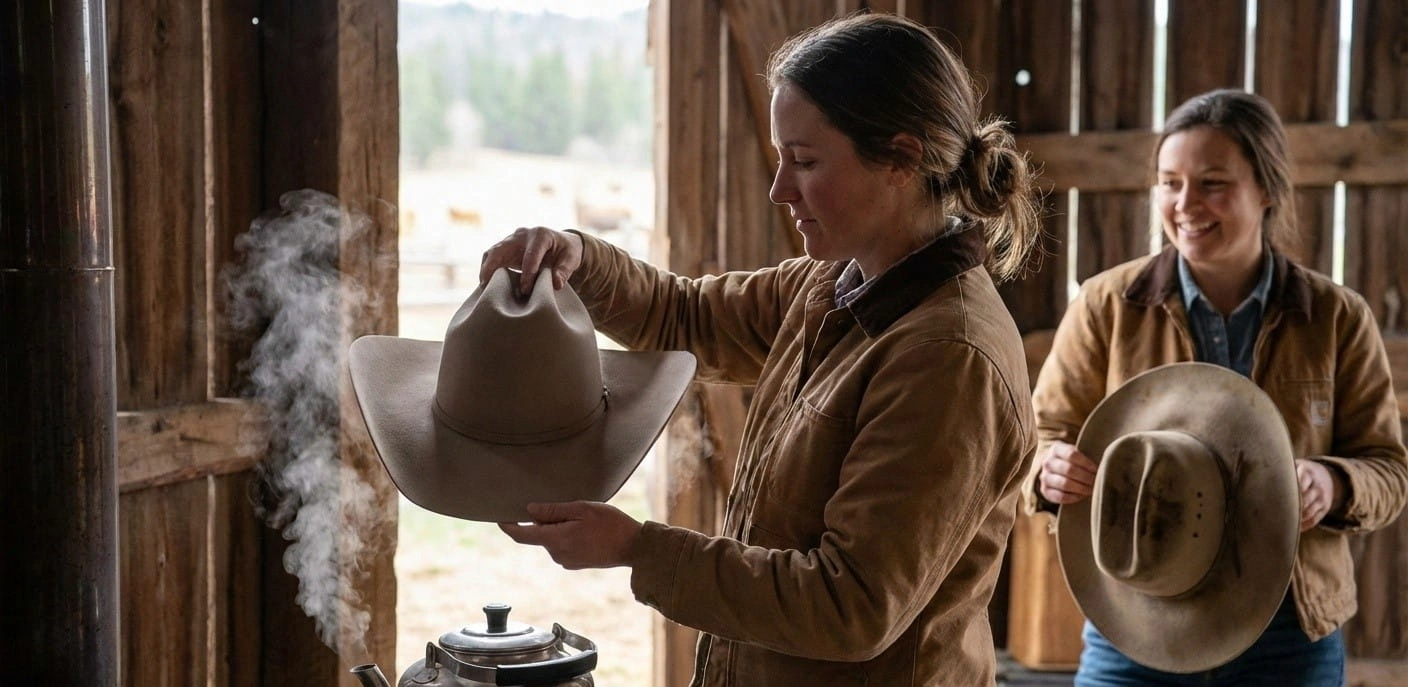
Method 1: The Steam Method (The Gold Standard)
This is the most effective way to break in a hat quickly. It’s what professional hat shapers do, but you can do it in your kitchen.
What you need:
- A tea kettle (or a pot of boiling water).
- Your hands.
- Patience.
The Process:
- Get the Steam Going: Boil your water until you have a steady, strong stream of steam coming out of the spout.
- Target the Sweatband: This is the secret. Don’t just steam the outside of the hat. You want to steam the inside band. Hold the hat about 6 inches away from the steam spout. You want the warm moisture to penetrate the leather or Dri-Lex sweatband and the felt behind it.
- The “Safety” Warning: Do not hold it there until it’s soaking wet. You just want it warm and pliable. 30 seconds is usually enough.
- The Stretch: Once it’s warm, put the hat on your head immediately. It will feel warm and slightly damp—this is good.
- Wear It: Pull it down to exactly where you want it to sit. The heat softens the stiffener and the fibers, allowing them to expand around your specific head shape. Keep it on for at least 20-30 minutes until it cools and dries completely.
Pro Tip: If you have that specific “Long Oval” pain (forehead pressure), while the hat is warm, take it off and gently pull the hat lengthwise with your hands—tugging the front and back brim apart slightly—then put it back on.
Method 2: The “Hat Jack” (For the Stubborn Hat)
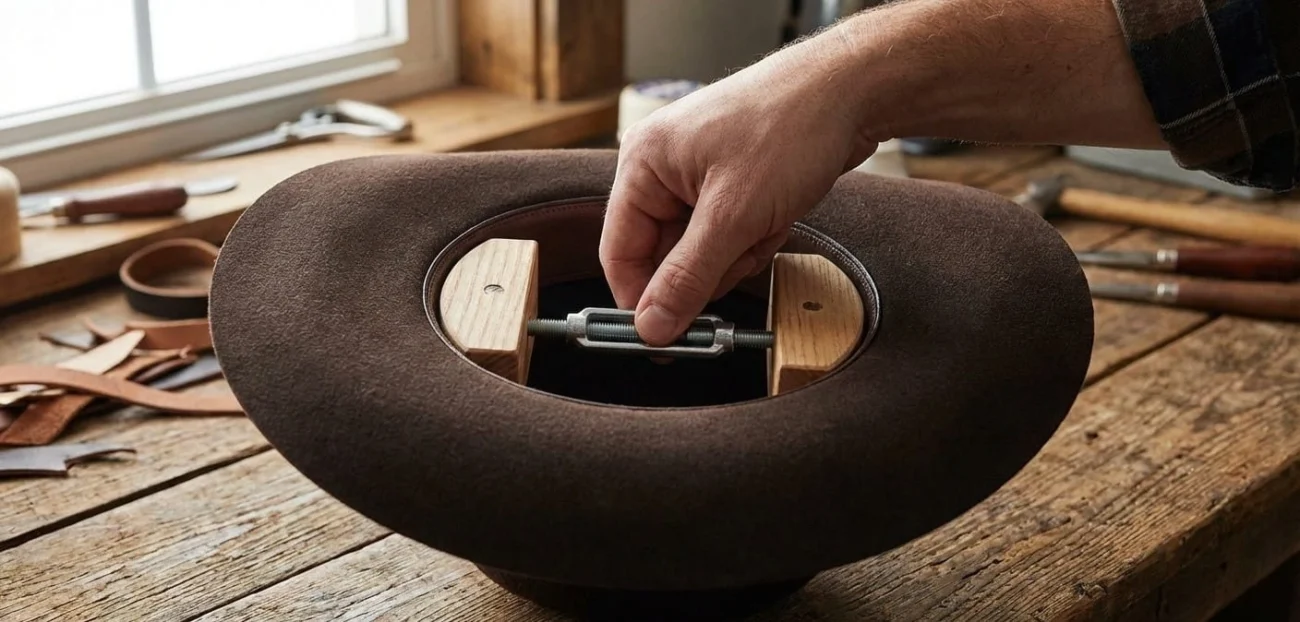
Sometimes, your head just can’t take the pressure long enough to break it in naturally. If you are getting a headache before the hat has a chance to mold, you need a tool.
Enter the Hat Jack (or hat stretcher).
This is a simple wooden device with a turnbuckle in the middle. You insert it into the hat, turn the handle, and it pushes the sides out.
How to use it without ruining your hat:
- Steam First: Never stretch a cold dry hat; you might crack the stiffener or tear the sweatband. Steam it first (as per Method 1).
- Insert the Jack: Place the wooden blocks against the leather sweatband.
- The “Quarter Turn” Rule: Turn the handle until it is snug. Then, give it one or two more turns. Do not crank it like you are changing a tire. You want gentle pressure, not aggressive force.
- Let it Sit: Leave it overnight.
This is essentially “outsourcing” the pain. Instead of your forehead doing the work of pushing the felt out, the wood does it for you while you sleep.
Method 3: The Cowboy Way (Sweat and Time)
If you ask an old-school rancher how to break in a hat, they won’t talk about tea kettles. They’ll tell you to “just wear the damn thing.”
There is truth to this, but you have to be strategic.
- The “30-Minute Rule”: Do not try to wear your new hat for an 8-hour day immediately. You will be miserable. Wear it for 30 minutes while you do dishes. Then take it off. The next day, do 45 minutes while you walk the dog.
- Heat is Your Friend: The best time to break in a hat is when you are slightly warm. Your body heat and the natural moisture from your forehead act as a slow-motion steam treatment.
- Hair Matters: If you have thick hair, wear it down when breaking in the hat. If you break it in with your hair in a braid tucked up, the hat will mold to that extra bulk. The day you wear your hair down, the hat will be loose.
Material Matters: Felt vs. Straw vs. Leather
Not all hats break in the same way.
1. Fur Felt & Wool: These are the easiest to mold. They have a “memory.” Once you steam and stretch them, they tend to stay that way. However, wool is generally stiffer and more stubborn than beaver or rabbit fur. If you have a wool hat, you may need to repeat the steam process 3-4 times.
2. Straw: Straw is tricky. Most straw hats are heavily lacquered to keep them stiff. If you try to stretch them dry, they will crack. You must use steam. The steam melts the lacquer slightly, allowing the straw fibers to move. Be very gentle with straw—if you hear a “crunch,” stop.
3. Leather: Leather hats are the hardest. They don’t respond to steam as well as felt. For leather, you need a leather conditioner. Apply a conditioner to the inside band to soften the leather fibers, then wear it. It takes longer, but eventually, it will fit like a custom glove.
Troubleshooting: “My Hat Still Hurts!”
You’ve steamed it, you’ve stretched it, and you still have a red mark.
- Check the “Spacer” situation: Sometimes, the hat is actually too big, but it’s wobbling, so you are cranking it down too tight. If you have gaps on the sides, buy foam hat tape (weather stripping also works in a pinch). Place the foam strips under the sweatband on the sides. This fills the gap without forcing you to pull the hat down so tight it hurts your forehead.
- The “Pop Culture” Reality Check: We see stars in movies or on Instagram wearing hats that look effortlessly comfortable. We think, “Why does mine look stiff?” Remember that in Pop culture, especially in films like Yellowstone or music videos, those hats are often custom-shaped by professional hatters for thousands of dollars. They aren’t pulling them out of a box from a standard retailer. Don’t compare your Day 1 journey to their Day 1000 look.
The “Retro Disco” Trap
A quick side note on expectations. If you are used to wearing a retro disco cowboy hat—you know, the sparkly ones made of foam or soft polyester that you buy for a bachelorette party—you might be shocked by the rigidity of a real western hat.
Costume hats are soft, floppy, and have zero structure. A real cowboy hat is a piece of protective gear. It is supposed to be stiff. It is supposed to protect you from hail, sun, and low-hanging branches. Do not try to make your high-quality Stetson feel like a soft foam party hat. It never will, and it shouldn’t. The structure is what gives it that sharp, powerful silhouette.
Maintenance During the Break-In Period
How you store your hat while you are breaking it in is just as important as how you wear it.
- Never lay it flat on its brim: This will flatten out the curve you love. Always store it upside down on its crown (like a bowl).
- Don’t leave it in a hot car: You might think, “Oh, the heat of the car will help stretch it!” No. The extreme heat will shrink the leather sweatband, turning your size 7 into a size 6. It can also warp the brim into a rollercoaster shape that is impossible to fix without professional help.
- The “Resting” Stand: If you really want to speed up the process, keep the hat on a hat stand or a makeshift form (like a balloon blown up to your head size) when you aren’t wearing it. This prevents the leather band from shrinking back down as it dries.
Final Thoughts
Breaking in a hat is a relationship. It takes a little friction at the beginning to get to the comfort at the end.
If you are frustrated, just remember: that stiffness means quality. It means you bought a hat that is going to last for 20 years, not 20 minutes. Use the steam, get a Hat Jack if you need one, and give it time.
One day soon, you’ll put that hat on, and you won’t even feel it touching your head. It will just feel like an extension of you. And that is when the magic really starts.